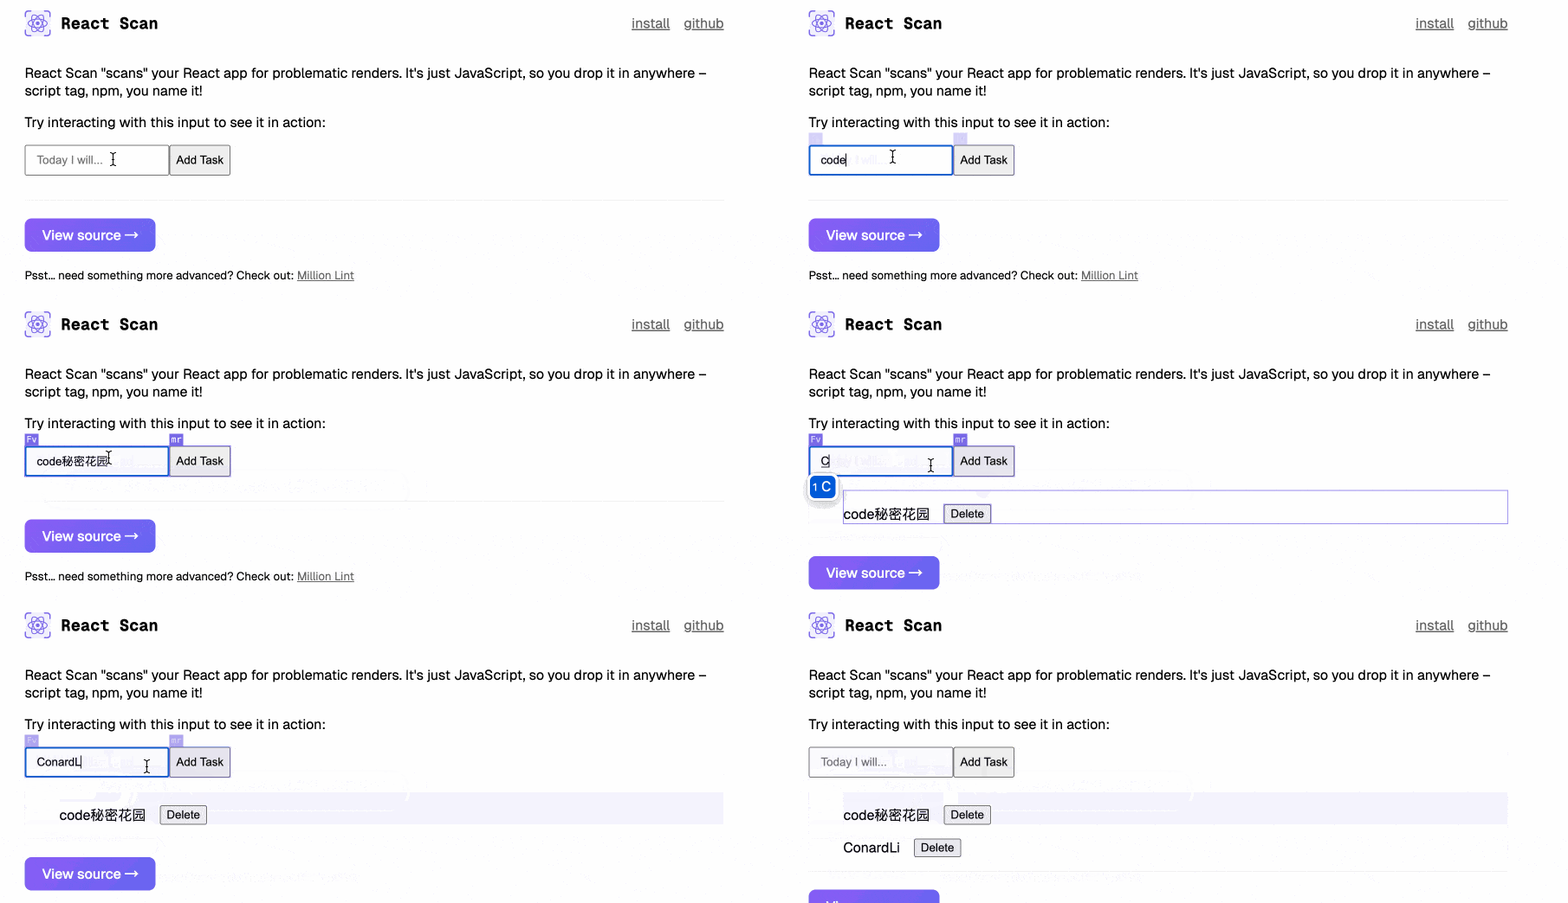
文章概览
- React Scan工具完整使用指南
- React组件性能优化最佳实践
- 实战案例分析与优化方案
- 2024年React性能调试新方法
适合读者:
- React开发工程师
- 前端性能优化工程师
- React应用开发团队
- Web性能优化爱好者
前言
对于大型React应用来说,性能优化是一个永恒的话题。在React Compiler尚未广泛应用的当下,重复渲染问题仍然是影响应用性能的主要因素。React Scan应运而生,为开发者提供了一个精准定位性能问题的强大工具。
学习要点
- 重复渲染问题:掌握React重复渲染的常见场景及其性能影响
- React Scan配置:学习工具的安装方法和基础配置
- API使用:熟悉核心API功能及使用场景
- 性能优化实践:掌握React.memo、useCallback等优化手段
- 实战应用:通过示例了解性能检测和优化方法

React重复渲染深度解析
1. 引用类型导致的重新渲染
<ExpensiveComponent
  onClick={() => alert('hi')}
  style={{ color: 'purple' }}
/>
每次渲染时都会创建新的函数和样式对象,导致不必要的重渲染。
2. 组件更新链问题
function ParentComponent() {
  const [count, setCount] = useState(0);
  return (
    <div>
      <button onClick={() => setCount(count + 1)}>计数器</button>
      <ChildComponent />
    </div>
  );
}
父组件状态更新会触发子组件重渲染,即使子组件不依赖这些状态。
3. 状态频繁变化
function Counter() {
  const [count, setCount] = useState(0);
  useEffect(() => {
    const interval = setInterval(() => {
      setCount(prev => prev + 1);
    }, 1000);
    return () => clearInterval(interval);
  }, []);
  return <div>计数: {count}</div>;
}
React Scan安装配置
Script标签引入
<!DOCTYPE html>
<html lang="zh-CN">
  <head>
    <script src="https://unpkg.com/react-scan/dist/auto.global.js"></script>
  </head>
</html>
Next.js配置
// pages/_document.tsx
import { Html, Head, Main, NextScript } from 'next/document';
export default function Document() {
  return (
    <Html lang="zh-CN">
      <Head>
        <script src="https://unpkg.com/react-scan/dist/auto.global.js"></script>
      </Head>
      <body>
        <Main />
        <NextScript />
      </body>
    </Html>
  );
}
NPM安装
npm install react-scanimport { scan } from 'react-scan';
import React from 'react';
scan({
enabled: true,
log: true
});核心API详解
scan(options)
scan({
  enabled: true,         // 启用扫描
  includeChildren: true, // 包含子组件
  playSound: true,      // 声音提示
  log: false,           // 控制台日志
  showToolbar: true,    // 显示工具栏
  renderCountThreshold: 0,
  report: false,
  onCommitStart: () => {},
  onRender: (fiber, render) => {},
  onCommitFinish: () => {},
});
withScan() 组件扫描
withScan(Component, {
  enabled: true,
  log: true,
  // ...其他配置项
});
性能报告获取
scan({ report: true });
const report = getReport();
for (const component in report) {
  const { count, time } = report[component];
  console.log(`${component}渲染${count}次,耗时${time}ms`);
}
实战示例
import React, { useState } from 'react';
import { scan, getReport } from 'react-scan';
scan({
  enabled: true,
  log: true,
  playSound: true,
  showToolbar: true,
  report: true,
});
// 性能报告定时输出
setInterval(() => {
  const report = getReport();
  for (const component in report) {
    const { count, time } = report[component];
    console.log(`${component}渲染${count}次,耗时${time}ms`);
  }
}, 1000);
const App = () => {
  const [theme, setTheme] = useState('light');
  return (
    <div className="App">
      <button onClick={() => setTheme(theme === 'light' ? 'dark' : 'light')}>
        切换主题
      </button>
      <div style={{
        backgroundColor: theme === 'light' ? '#fff' : '#333',
        color: theme === 'light' ? '#000' : '#fff',
      }}>
        <ExpensiveComponent />
        <Counter />
        <ParentComponent />
      </div>
    </div>
  );
};
优化最佳实践
1. React.memo应用
const ChildComponent = React.memo(function ChildComponent() {
  return <div>优化后的子组件</div>;
});
2. useCallback优化
function ParentComponent() {
  const handleClick = useCallback(() => {
    alert('优化后的点击事件');
  }, []);
  const styles = useMemo(() => ({
    color: 'purple'
  }), []);
  return <ExpensiveComponent onClick={handleClick} style={styles} />;
}
3. PureComponent使用
class OptimizedComponent extends React.PureComponent {
  render() {
    return <div>使用PureComponent优化</div>;
  }
}
常见问题解答
- React Scan vs React DevTools
- 更精准的渲染检测
- 提供编程API
- 支持性能报告导出
- 即将支持特性
- React Native支持
- Chrome插件
- 更多性能分析功能
总结与建议
- 合理使用React Scan进行性能监控
- 针对性采用优化方案
- 持续跟踪性能指标
- 定期进行优化复查
参考资源
- React官方性能优化指南:https://react.dev/reference/react/memo
- React Scan官方文档:https://github.com/react-scan/react-scan
- React DevTools使用教程:https://react.dev/learn/react-developer-tools
- React性能优化实践:https://legacy.reactjs.org/docs/optimizing-performance.html
- React Hooks性能优化:https://react.dev/reference/react/useMemo
- React组件优化指南:https://react.dev/learn/keeping-components-pure
声明:本站所有文章,如无特殊说明或标注,均为本站原创发布。任何个人或组织,在未征得本站同意时,禁止复制、盗用、采集、发布本站内容到任何网站、书籍等各类媒体平台。如若本站内容侵犯了原著者的合法权益,可联系我们进行处理。


